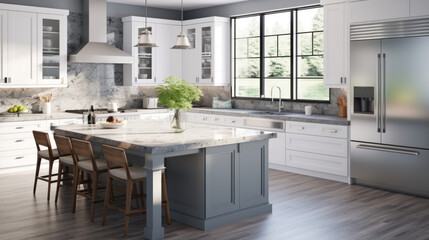
Glazing is a popular technique that adds depth, tone, and character to cabinetry. This finishing touch works well on painted cabinets or stained wood cabinetry. When applied correctly, glazing is an effective way to achieve a customized look without having to do a full kitchen remodel. It also looks great on bathroom vanities and free standing furniture.
Start with a Clean Surface
Cabinet Refinishing San Jose CA process begins with a clean surface. Cabinets and their doors should be thoroughly cleaned with a degreaser or another mild cleaner to remove any dirt build-up that might mar the finish. Next, a light sanding of the surfaces with a foam sanding block is done to give the primer something to adhere to. This step should also be done with care as too much sanding can leave marks on the surface of your cabinets. Once the sanding is complete, you’ll need to vacuum again and then use a tack cloth to ensure that all of the sanding dust has been removed before moving forward with your project.
Before applying any glaze, you should be sure to protect the surrounding areas of your home with drop cloths and masking tape. If you are refinishing your cabinet doors and drawers, it is best to remove the hardware before beginning the glazing process. For wood cabinetry, it is best to stain them first so that the glaze doesn’t absorb into the grain and create a different color. It is important to choose the right glaze shade and to understand how warm or cool it will look. Your kitchen design specialist should be able to help you select the right tone and glaze style that complements your other finishes.
After the base coat has dried, cabinet finishers will apply a thin glaze. The amount of glaze they’ll apply will depend on the look you’re trying to achieve. A glaze with a high amount of pigment will provide a richer, warmer appearance, while a thinner glaze will have more subtle results.
Once the glaze has been applied, the finishers will brush over it to smooth out any streaks and ensure that the coverage is even. They’ll then wipe the cabinetry with a clean rag to eliminate any excess glaze that was left behind on corners and surface details. They’ll repeat this step until the cabinetry is the desired appearance.
If you’re looking for a more dramatic effect, you can try a technique called pin-striping. This technique will give the cabinets a more rustic and aged look that may be better suited for a home with a traditional design aesthetic. If you’re hoping for a more modern look, it’s best to avoid this technique and opt instead for a more flat or one-note finish.
Apply a Base Coat
When it comes to semi custom cabinets, one of the reasons they win out over big box store cabinetry is because of the hundreds of choices available in door styles, stains and paints. Incorporating glaze and other types of finishes adds another layer to the custom look, something that is difficult to achieve with prefabricated cabinets.
When working with glaze, it’s best to apply a fresh coat of paint or stain before applying the glazing. This ensures the color or finish is smooth and even, which will give a better overall appearance when it’s finished. It also helps eliminate any imperfections in the wood, which would otherwise show through the glaze. After painting or staining, allow the cabinet doors, drawer fronts and frames to dry completely before moving on. If necessary, sand the surface with a foam sanding block to lightly roughen it. Vacuum the sanding dust and wipe down the surfaces to remove any remaining debris, before applying a light coat of primer.
For best results, apply the primer using a smooth-surface mini roller. Use a brush for the edges and tight spots, while the roller covers larger areas. If needed, use a stain-blocking primer that seals knots and other defects in the wood that might bleed through the topcoat. For most projects, an oil-based or 100 percent acrylic latex primer should work fine.
Next, use a soft-bristled brush to apply a thin coat of glaze to the door or frame surface, following the grain of the wood. Let the glaze dry for at least an hour before proceeding. If the glaze appears too dark, apply another coat and wipe it again to lighten it up.
Some home owners choose to glaze their cabinet doors, while others incorporate the technique on the frames and cupboard boxes/frames as well. It’s important to consider the overall tone and style of the kitchen when choosing a glaze color. Distressed or antique cabinetry was very popular a decade ago, but today many are leaning toward more natural or earthy tones, or a subtle and classic look.
Apply the Glaze
When applying the glaze, it is important to use a brush that is large enough for the job. Typically, disposable bristle brushes, also known as chip brushes, work best for this task. There are specialized glazing brushes available on the market that are expensive, but a regular sized chip brush is just as effective for a much lower price. You will need three or four two-inch brushes to complete the project.
After applying the glaze, it is important to wipe it off quickly. This will help to remove any unwanted excess glaze that you do not want on your cabinets. You may need to repeat the wiping process until you are satisfied with the results.
Glazing is a great way to add color and dimension to cabinetry that has been either painted or stained. Unlike stain, glaze does not penetrate into the wood grain. Instead, it is a semi-transparent second color that highlights the details of your doors and drawer fronts, as well as moldings and edges. This technique is especially popular with painted cabinetry, but it can also be applied to refaced or even wood-stained cabinetry as well.
While glazing is a popular choice for many kitchens, it is important to keep in mind that it will require extra time and care in order to be successful. If you are looking to save time and still want to achieve the same effect, consider antiquing. This is a similar process that allows you to achieve a vintage look, but it requires selective sanding in certain areas to expose the original base color.
Both of these finishes are great options for homeowners who are not ready to commit to a full reface and replacement project, but still want to give their home a fresh new look. As with glazed cabinetry, it is critical that the design style of your home and kitchen are well suited to these finishes. Pin-striping, for example, tends to achieve a more rustic effect and would not be appropriate for a modern home or kitchen. In addition, glazing works better on cabinets that have a light or mid-tone paint to ensure that the color and glaze do not stand out too dramatically.
Finishing Touches
Custom cabinet finishing provides an excellent opportunity to elevate your kitchen’s design. Not only do the techniques enhance visual appeal, they also protect cabinetry from the wear and tear of daily use. Whether your preference is the timeless appeal of painted finishes, the elegance of glazed surfaces, the natural beauty of stained wood, or the character of distressed techniques, these finishing options can transform standard cabinetry into a design statement that adds value and appeal to your home.
Paint is one of the most popular cabinet finishes, allowing homeowners to create a wide range of looks with limitless color options. While white remains a popular choice, other color choices, from soft grays to rich blues and greens, allow homeowners to customize cabinetry for their specific aesthetic. Adding glaze to painted cabinets offers an additional level of design, highlighting details and contours and creating luxurious layered looks.
Glazed finishes work best on cabinet styles with raised or detailed features that benefit from the highlighting effects of the technique, like traditional raised panel doors and cathedral arch designs. Shaker-style doors, on the other hand, have clean lines that can be enhanced with subtle glazing applications to highlight frame and panel edge detail.
Another popular option is brushed glazes, in which the glaze is gently wiped with a rag or natural bristle paint brush in long strokes over the cabinetry for an elegant finish. The result is a look that feels refined and sophisticated, and it’s especially effective when used over a darker base coat, such as the chocolate pictured on these Santa Fe style cabinetry in maple wood.
Distressed finishes are another refinishing method that’s gaining popularity, giving new cabinetry the appearance of character and age through techniques such as strategic sanding, denting, and color layering. Skilled craftsmen study how cabinetry naturally ages and wears to accurately replicate these patterns, resulting in an authentic-looking finish that adds personality to your kitchen.